Contents
- What is MEAN stack?
- Preview:
- Backend Development
- Prerequisite:
- File Structure Preview:
- Step 1:Initialize Node.js project
- Step 2: Install Packages
- Step 3: Setup Express Application
- Step 4: Update package.json
- Step 5: Setup Environment Variables
- Step 6: Create A Model
- Step 7: Create A Controller
- Step 8: Create A Route
- Step 9: Start the Express App
- Test the API:
- Front End Development
- Step 5: Create Module and Routing
What is MEAN stack?
The MEAN stack is a popular technology stack used for building web applications. MEAN is an acronym that stands for:
- MongoDB: A NoSQL database that stores data in flexible, JSON-like documents. It allows for scalable and high-performance data storage, making it well-suited for handling large volumes of unstructured data.
- Express.js: A web application framework for Node.js. It simplifies the process of building robust and maintainable web applications and APIs. Express provides a range of features for web and mobile applications, including routing, middleware support, and template engines.
- Angular: A front-end web framework developed by Google. It is used for building dynamic, single-page web applications (SPAs) with a rich user interface. Angular allows developers to use HTML as a template language and extends HTML’s syntax to express the application’s components clearly and succinctly.
- Node.js: A JavaScript runtime built on Chrome’s V8 JavaScript engine. Node.js enables server-side execution of JavaScript, allowing developers to use JavaScript for both client-side and server-side code. This results in a unified development environment and makes it easier to build scalable and efficient web applications.
Typical Workflow in a MEAN Stack Application
- Client-Side (Angular): The user interacts with the front-end of the application, built with Angular. Angular handles the presentation layer, making API calls to the back-end to fetch or update data.
- Server-Side (Node.js and Express.js): Express.js handles the routing and middleware, processing incoming requests and responding to the client. Node.js runs the server and provides a runtime environment for executing JavaScript code.
- Database (MongoDB): Data is stored and retrieved from MongoDB. The server communicates with the database, performing CRUD (Create, Read, Update, Delete) operations as required by the application.
In summary, the MEAN stack provides a full-stack JavaScript solution for building modern web applications, offering a streamlined development process and a cohesive technology ecosystem.
Preview:
Backend Development
We will now develop our backend.
Prerequisite:
- MongoDB
- Node (This tutorial uses 18.20.2)
File Structure Preview:

Step 1:Initialize Node.js project
Create a folder named mean-backend, go into the newly created folder and open your terminal or cmd, and run this command:
npm init -y
Running npm init -y initializes a new Node.js project in the current directory using default values for package.json fields, without requiring user input. The -y flag stands for “yes,” which means it automatically accepts all defaults. This command is useful for quickly setting up a new project without having to manually enter information for each field in the package.json file.
Step 2: Install Packages
After initializing a node.js project, let’s install the packages that we will be using:
npm install express
npm install dotenv
npm install cors
npm install mongoose
- express – Express.js is a minimal and flexible Node.js web application framework that provides a robust set of features for building web applications and APIs. It is designed to make the process of creating server-side applications in Node.js simpler and more efficient.
- dotenv – is a popular npm package that loads environment variables from a .env file into process.env, making it easy to manage configuration settings in Node.js applications.
- cors – CORS (Cross-Origin Resource Sharing) middleware package in a Node.js project. CORS is a security feature implemented by web browsers to prevent unauthorized access to resources hosted on a different origin (domain, protocol, or port) than the one making the request.
- mongoose – Mongoose is an Object Data Modeling (ODM) library for MongoDB and Node.js, designed to work in an asynchronous environment. It provides a straightforward schema-based solution to model your application data and handle interactions with a MongoDB database.
Then let’s install the nodemon package, if you have already installed nodemon you can skip this.
- nodemon – is a utility that monitors changes in your Node.js application files and automatically restarts the server whenever a change is detected. This eliminates the need to manually stop and restart the server every time you make changes to your code, making the development process more efficient and productive. Nodemon is particularly useful during the development phase of a Node.js application when you frequently make changes to your code and want to see the changes reflected immediately without having to restart the server manually.
npm install -g nodemon
Running npm install -g nodemon installs the Nodemon package globally on your system. The -g flag stands for “global,” which means Nodemon will be installed in a location accessible system-wide, rather than being installed locally in a specific project directory.
Step 3: Setup Express Application
Create a file inside our root folder, name the file server.js, and add these lines of codes:
server.js
require('dotenv').config()

const express = require('express')
const mongoose = require('mongoose')
const cors = require('cors')
const projectRoutes = require('./routes/projectApi')

// express app
const app = express()

// middleware
app.use(express.json())
app.use(cors())
app.use((req, res, next) => {
  console.log(req.path, req.method)
  next()
})

// routes
app.use('/api/projects', projectRoutes)

// connect to mongodb
mongoose.connect(process.env.MONGO_URI)
.then(() => {
    console.log('connected to database')
    // listen to port
    app.listen(process.env.PORT, () => {
        console.log('listening for requests on port', process.env.PORT)
    })
})
.catch((err) => {
    console.log(err)
})
In an Express.js application, the entry point is typically the main file where you initialize the Express server and define its configurations, routes, and middleware. This main file is commonly named server.js or app.js, but it can be named anything you prefer.
The entry point file is where you set up your Express application by importing the necessary modules, creating an instance of Express, defining routes, applying middleware, and starting the server. It’s the starting point of your application’s execution.
Step 4: Update package.json
Add this line on the scripts field “dev”: “nodemon server.js”. The scripts field defines a set of commands that can be executed via npm. These scripts provide shortcuts for common development tasks, such as starting the server, running tests, building the project, etc.
package.json
{
  "name": "express-api",
  "version": "1.0.0",
  "description": "",
  "main": "index.js",
  "scripts": {
    "test": "echo \"Error: no test specified\" && exit 1",
    "dev": "nodemon server.js"
  },
  "keywords": [],
  "author": "",
  "license": "ISC",
  "dependencies": {
    "cors": "^2.8.5",
    "dotenv": "^16.4.5",
    "express": "^4.19.2",
    "mongoose": "^8.3.2"
  }
}
Step 5: Setup Environment Variables
Create a .env file, and add the environment variables.
.env
PORT=4000
MONGO_URI=mongodb://127.0.0.1:27017/express_rest_api
- PORT – port number on which the server should listen for incoming HTTP requests
- MONGO_URI – refers to the Uniform Resource Identifier (URI) used to connect to a MongoDB database. It contains information such as the protocol, hostname, port, database name, and optionally authentication credentials.
You can get the url when you open the MongoDBCompass:

Note: if an error occurs when connecting to db when we start our app. Change the localhost to 127.0.0.1
Sample .env
PORT=4000
MONGO_URI=mongodb://127.0.0.1:27017/express_rest_api
Step 6: Create A Model
Create a folder named models inside our root folder, and inside it create a file named projectModel.js and add these lines of code.
models\projectModel.js
const mongoose = require('mongoose')

const Schema = mongoose.Schema

const projectSchema = new Schema({
  name: {
    type: String,
    required: true
  },
  description: {
    type: String,
    required: true
  },

}, { timestamps: true })

module.exports = mongoose.model('project', projectSchema)
Step 7: Create A Controller
Create a folder named controllers inside our root folder, and inside it create a file named projectController.js and add these lines of code.
controllers\projectController.js
const Project = require('../models/projectModel')
const mongoose = require('mongoose')

// get list of projects
const getProjects = async (req, res) => {
  const projects = await Project.find({}).sort({createdAt: -1})

  res.status(200).json(projects)
}

// create a new project
const createProject = async (req, res) => {
    const {name, description} = req.body

    // add to the database
    try {
      const project = await Project.create({ name, description })
      res.status(200).json(project)
    } catch (error) {
      res.status(400).json({ error: error.message })
    }
  }

// get specific project
const getProject = async (req, res) => {
  const { id } = req.params

  if (!mongoose.Types.ObjectId.isValid(id)) {
    return res.status(404).json({error: 'No project found for id ' + id})
  }

  const project = await Project.findById(id)

  if (!project) {
    return res.status(404).json({error: 'No project found for id ' + id})
  }

  res.status(200).json(project)
}

// update a project
const updateProject = async (req, res) => {
    const { id } = req.params
    const {name, description} = req.body
    if (!mongoose.Types.ObjectId.isValid(id)) {
        return res.status(404).json({error: 'No project found for id ' + id})
    }

    const project = await Project.findOneAndUpdate({_id: id}, {name, description}, {returnOriginal: false})

    if (!project) {
      return res.status(404).json({error: 'No project found for id ' + id})
    }

    res.status(200).json(project)
}

// delete a project
const deleteProject = async (req, res) => {
    const { id } = req.params

    if (!mongoose.Types.ObjectId.isValid(id)) {
      return res.status(404).json({error: 'No project found for id ' + id})
    }

    const project = await Project.findOneAndDelete({_id: id})

    if(!project) {
      return res.status(404).json({error: 'No project found for id ' + id})
    }

    res.status(200).json({message: 'Project deleted.'})
  }


module.exports = {
  getProjects,
  createProject,
  getProject,
  updateProject,
  deleteProject
}
Step 8: Create A Route
Create a folder named routes inside our root folder, and inside it create a file named projectApi.js and add these lines of code.
routes\projectApi.js
const express = require('express')
const {
    getProjects,
    createProject,
    getProject,
    updateProject,
    deleteProject
} = require('../controllers/projectController')


const router = express.Router()

// get list of projects
router.get('/', getProjects)

// create a new project
router.post('/', createProject)

// get specific project
router.get('/:id', getProject)

// update a project
router.patch('/:id', updateProject)

// delete a project
router.delete('/:id', deleteProject)


module.exports = router
Step 9: Start the Express App
Run this command to start the Express App:
npm run dev
After successfully running your app, the base url of our app will be:
http://localhost:4000
Test the API:
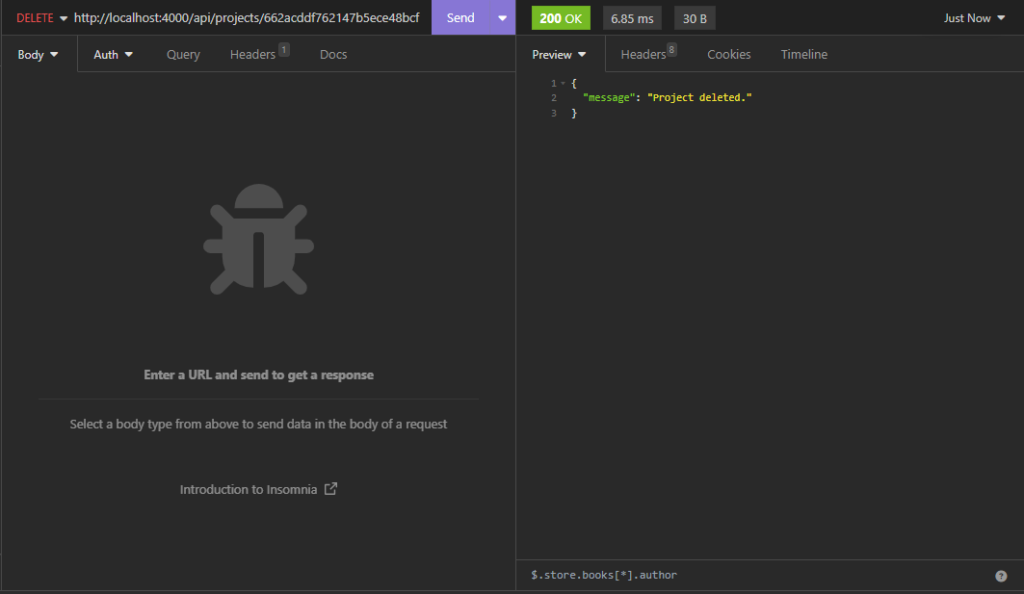
We will be using Insomia for testing our API, but you can use your preferred tool.
POST Request – This request will create a new resource.

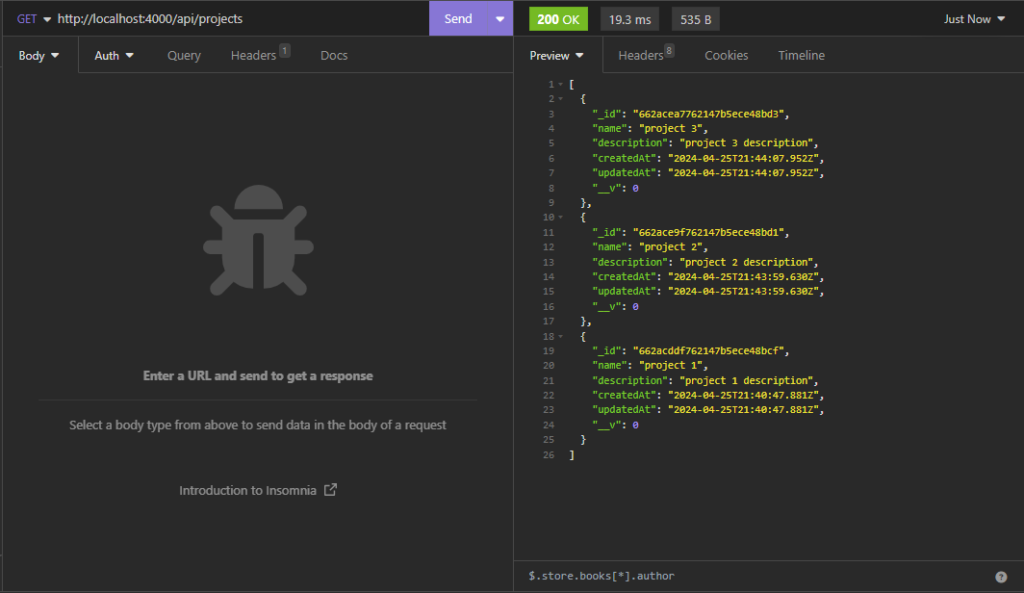
GET Request – This request will retrieve all the resources.
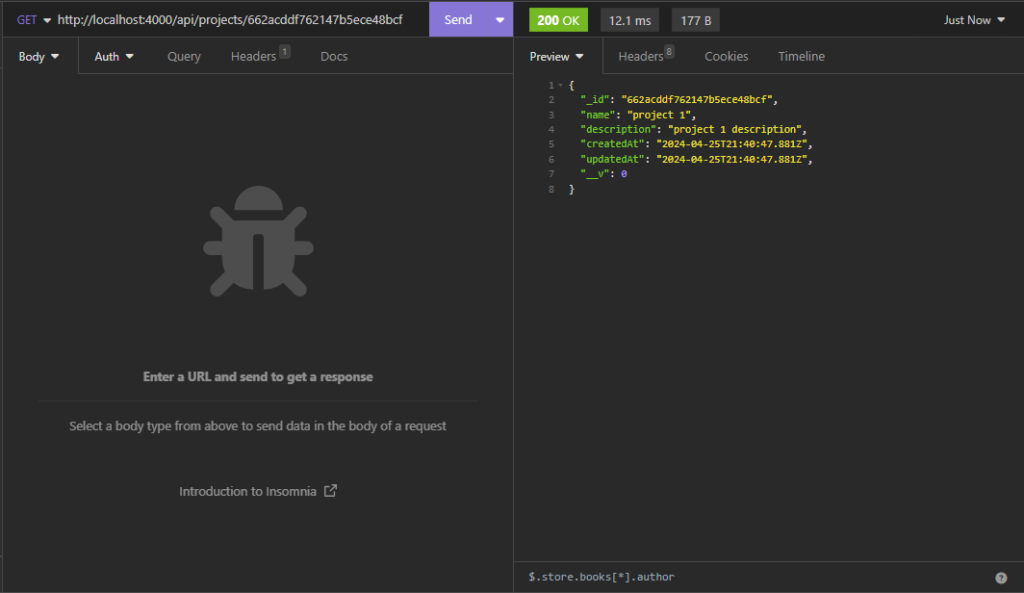
GET Request (with id) – This request will retrieve a particular resource.
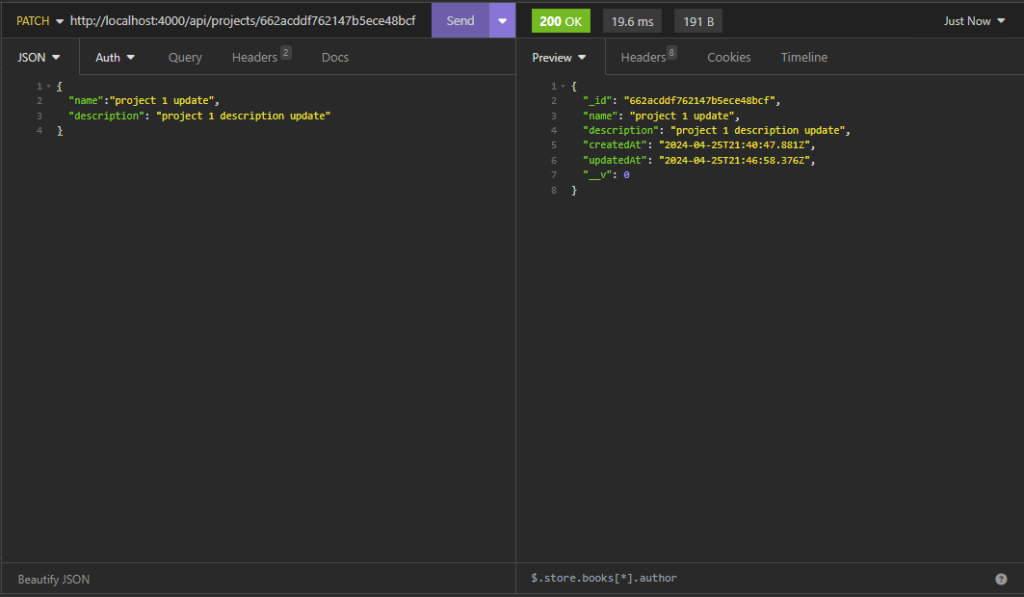
PATCH Request – This request will update a resource.
DELETE Request – This request will delete a resource.
Front End Development
We will now develop our frontend.
Prerequisite:
- npm
- node (This tutorial uses 18.20.2)
- @angular/cli
Step 1: Create An Angular 17 Project
First, select a folder that you want the Angular 17 project to be created then execute this command on Terminal or CMD :
ng new mean-frontend --routing --no-standalone
Step 2: Install packages
After creating a fresh angular project, go to the Angular 16 project folder and install these packages:
- bootstrap – a package of bootstrap framework
- sweetalert2 – a package for pop-up boxes
- axios – a promised-based HTTP library that is used to request to a server or API.
npm i bootstrap
npm i sweetalert2
npm i axios
After installing the packages. import the bootstrap in style.css.
src\styles.css
/* You can add global styles to this file, and also import other style files */
@import "bootstrap/dist/css/bootstrap.css";
Step 3: Configure Application Environment
After installing the packages, we will now generate the app environment. We will declare the API base URL. Run the command below:
ng generate environments
After running the command this will generate files for the environment. let’s add value to the environment.
environment.development.ts
export const environment = {
    production: false,
    apiUrl: 'http://localhost:4000/',
};
After configuring the environment, let’s configure the axios on main.ts.
src\main.ts
import { platformBrowserDynamic } from '@angular/platform-browser-dynamic';

import { AppModule } from './app/app.module';
import axios from 'axios';
import { environment } from './environments/environment.development';


axios.defaults.baseURL = environment.apiUrl

platformBrowserDynamic().bootstrapModule(AppModule)
  .catch(err => console.error(err));
Step 4: Create Components
We will now create the components. run the command below:
ng generate component project/index
ng generate component project/create
ng generate component project/show
ng generate component project/edit
after running these commands it will create folders with files in them. We will now update the code on it.
src\app\project\create\create.component.ts
import { Component } from '@angular/core';
import { ProjectService } from '../project.service';
import Swal from 'sweetalert2'

@Component({
  selector: 'app-create',
  templateUrl: './create.component.html',
  styleUrls: ['./create.component.css']
})
export class CreateComponent {
  name:string = ''
  description:string = ''
  isSaving:boolean = false

  constructor(public projectService: ProjectService) {}

  handleSave(){
    this.isSaving = true
    this.projectService.create({name:this.name, description:this.description})
    .then(({data}) => {
      this.isSaving = false
      Swal.fire({
        icon: 'success',
        title: 'Project saved successfully!',
        showConfirmButton: false,
        timer: 1500
      })
      this.name = ""
      this.description = ""
      return data

    }).catch(error => {
      this.isSaving = false
      Swal.fire({
        icon: 'error',
        title: 'An Error Occured!',
        showConfirmButton: false,
        timer: 1500
      })
      return error
    })
  }


}
src\app\project\create\create.component.html
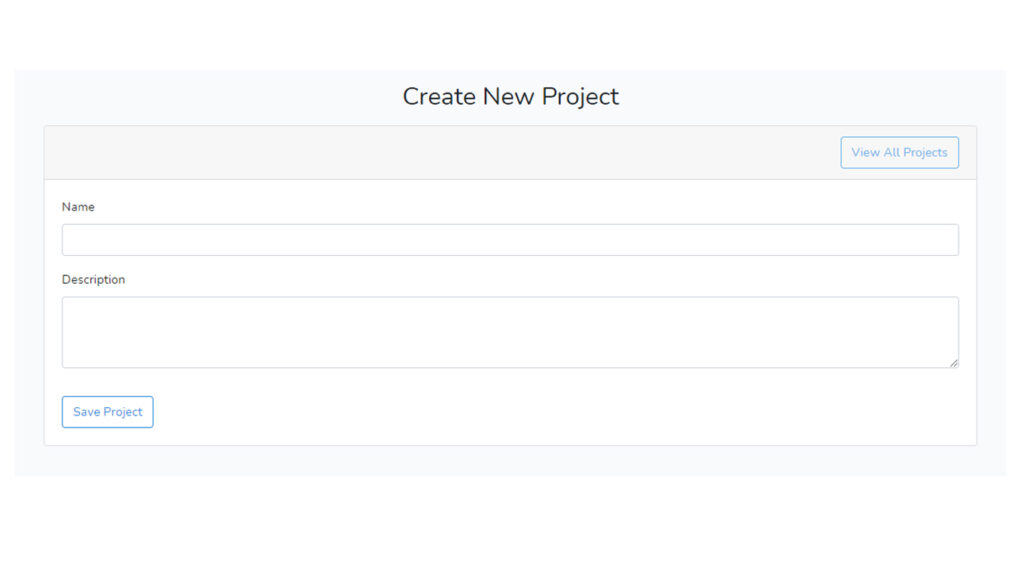
<h2 class="text-center mt-5 mb-3">Create New Project</h2>
<div class="card">
    <div class="card-header">
        <a routerLink="/project/index"
            class="btn btn-outline-info float-right"
            >View All Projects
        </a>
    </div>
    <div class="card-body">
        <form >
            <div class="form-group">
                <label html="name">Name</label>
                <input
                    [(ngModel)]="name"
                    type="text"
                    class="form-control"
                    id="name"
                    name="name"/>
            </div>
            <div class="form-group">
                <label html="description">Description</label>
                <textarea
                    [(ngModel)]="description"
                    class="form-control"
                    id="description"
                    rows="3"
                    name="description"></textarea>
            </div>
            <button
                [disabled]="isSaving"
                (click)="handleSave()"
                type="button"
                class="btn btn-outline-primary mt-3">
                Save Project
            </button>
        </form>
    </div>
</div>
src\app\project\edit\edit.component.ts
import { Component } from '@angular/core';
import { ProjectService } from '../project.service';
import { ActivatedRoute } from '@angular/router';
import Swal from 'sweetalert2'
import { Project } from '../project';

@Component({
  selector: 'app-edit',
  templateUrl: './edit.component.html',
  styleUrl: './edit.component.css'
})
export class EditComponent {
  project:Project
  isSaving:boolean = false

  constructor(public projectService: ProjectService, private route: ActivatedRoute) {
    this.project = {
      _id:this.route.snapshot.params['id'],
      name: '',
      description: ''
    }
  }

  ngOnInit(): void {
    this.projectService.show(this.route.snapshot.params['id']).then(({data}) => {
      this.project = data
    }).catch(error => {return error})

  }

  handleSave(){
    this.isSaving = true
    this.projectService.update(this.project)
    .then(({data}) => {
      this.isSaving = false
      Swal.fire({
        icon: 'success',
        title: 'Project saved successfully!',
        showConfirmButton: false,
        timer: 1500
      })
      return data

    }).catch(error => {
      this.isSaving = false
      Swal.fire({
        icon: 'error',
        title: 'An Error Occured!',
        showConfirmButton: false,
        timer: 1500
      })
      return error
    })
  }
}
src\app\project\edit\edit.component.html
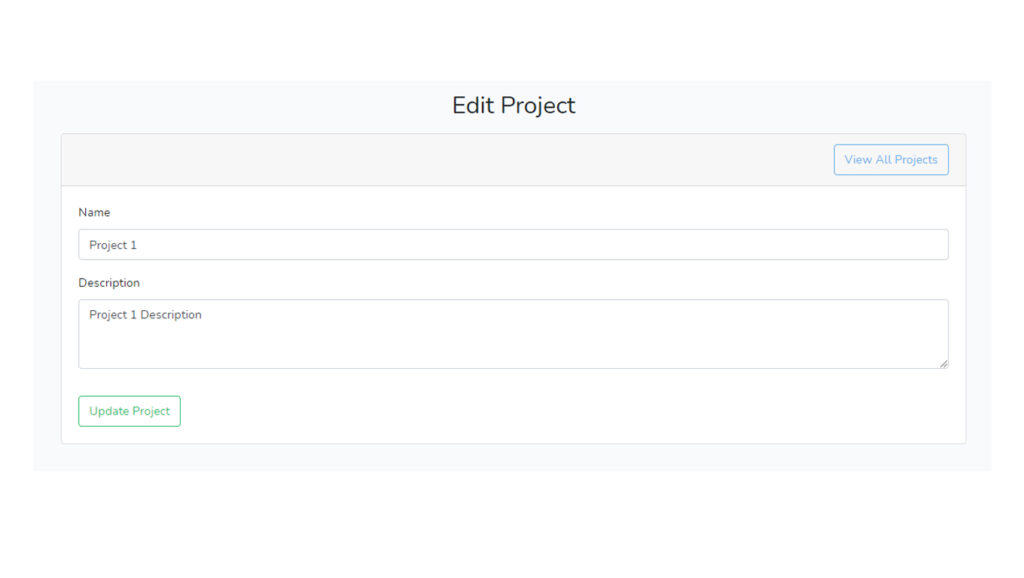
<h2 class="text-center mt-5 mb-3">Edit Project</h2>
<div class="card">
    <div class="card-header">
        <a routerLink="/project/index"
            class="btn btn-outline-info float-right"
            >View All Projects
        </a>
    </div>
    <div class="card-body">
        <form >
            <div class="form-group">
                <label html="name">Name</label>
                <input
                    [(ngModel)]="project.name"
                    type="text"
                    class="form-control"
                    id="name"
                    name="name"/>
            </div>
            <div class="form-group">
                <label html="description">Description</label>
                <textarea
                    [(ngModel)]="project.description"
                    class="form-control"
                    id="description"
                    rows="3"
                    name="description"></textarea>
            </div>
            <button
                [disabled]="isSaving"
                (click)="handleSave()"
                type="button"
                class="btn btn-outline-primary mt-3">
                Save Project
            </button>
        </form>
    </div>
</div>
src\app\project\index\index.component.ts
import { Component } from '@angular/core';
import { ProjectService } from '../project.service';
import { Project } from '../project';
import Swal from 'sweetalert2'

@Component({
  selector: 'app-index',
  templateUrl: './index.component.html',
  styleUrl: './index.component.css'
})
export class IndexComponent {

  projects: Project[] = [];

  constructor(public projectService: ProjectService) { }

  ngOnInit(): void {
    this.fetchProjectList()
  }

  fetchProjectList(){
    this.projectService.getAll().then(({data}) => {
      this.projects = data;
    }).catch(error => {return error})
  }

  handleDelete(id:number){
    Swal.fire({
      title: 'Are you sure?',
      text: "You won't be able to revert this!",
      icon: 'warning',
      showCancelButton: true,
      confirmButtonColor: '#3085d6',
      cancelButtonColor: '#d33',
      confirmButtonText: 'Yes, delete it!'
    }).then(result =>{
      if (result.isConfirmed) {

        this.projectService.delete(id)
        .then( response => {
          Swal.fire({
            icon: 'success',
            title: 'Project deleted successfully!',
            showConfirmButton: false,
            timer: 1500
          })
          this.fetchProjectList()
          return response
        }).catch(error => {
          Swal.fire({
            icon: 'error',
           title: 'An Error Occured!',
           showConfirmButton: false,
           timer: 1500
          })
          return error
        })

      }
    })
  }

}
src\app\project\index\index.component.html
<div class="container">
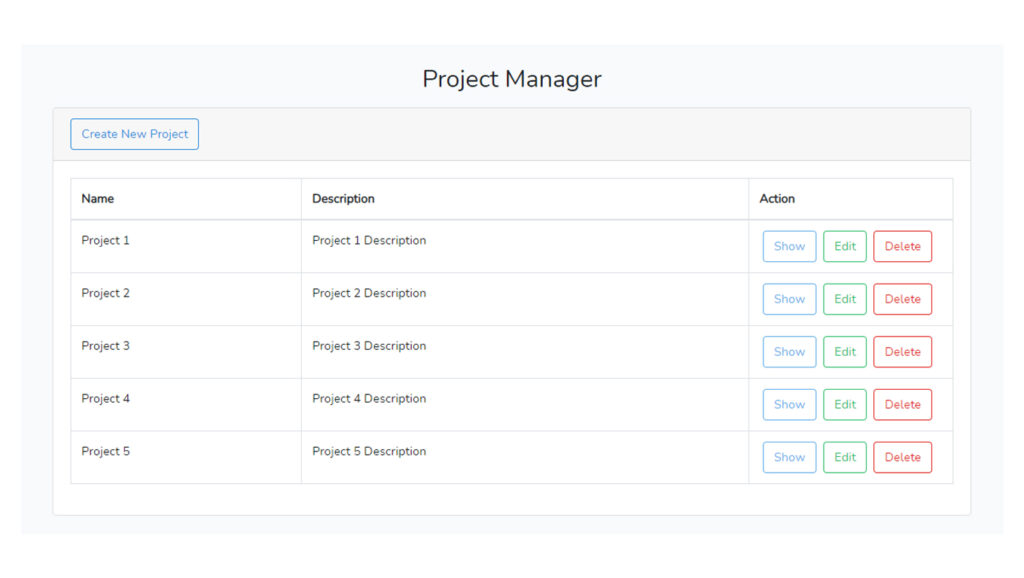
    <h2 class="text-center mt-5 mb-3">Project Manager</h2>
    <div class="card">
        <div class="card-header">
            <a routerLink="/project/create"
                class="btn btn-outline-primary float-right"
                >Create New Project
            </a>
        </div>
        <div class="card-body">

            <table class="table table-bordered">
                <thead>
                    <tr>
                        <th>Name</th>
                        <th>Description</th>
                        <th width="240px">Action</th>
                    </tr>
                </thead>
                <tbody>

                    <tr *ngFor="let project of projects" >
                        <td>{{ project.name }}</td>
                        <td>{{ project.description }}</td>
                        <td>
                            <a [routerLink]="['/project', project._id, 'show']" class="btn btn-outline-info mx-1">Show</a>
                            <a [routerLink]="['/project', project._id, 'edit']" class="btn btn-outline-success mx-1">Edit</a>
                            <button
                                (click)="handleDelete(project._id)"
                                class="btn btn-outline-danger mx-1">
                                Delete
                            </button>
                        </td>
                    </tr>

                </tbody>
            </table>
        </div>
    </div>
</div>
src\app\project\show\show.component.ts
import { Component } from '@angular/core';
import { ProjectService } from '../project.service';
import { ActivatedRoute } from '@angular/router';
import { Project } from '../project';

@Component({
  selector: 'app-show',
  templateUrl: './show.component.html',
  styleUrl: './show.component.css'
})
export class ShowComponent {
  project:Project

  constructor(public projectService: ProjectService, private route: ActivatedRoute) {
    this.project = {
      _id:this.route.snapshot.params['id'],
      name: '',
      description: ''
    }
  }

  ngOnInit(): void {
    this.projectService.show(this.route.snapshot.params['id']).then(({data}) => {
      this.project = data
    }).catch(error => {return error})

  }
}
src\app\project\show\show.component.html
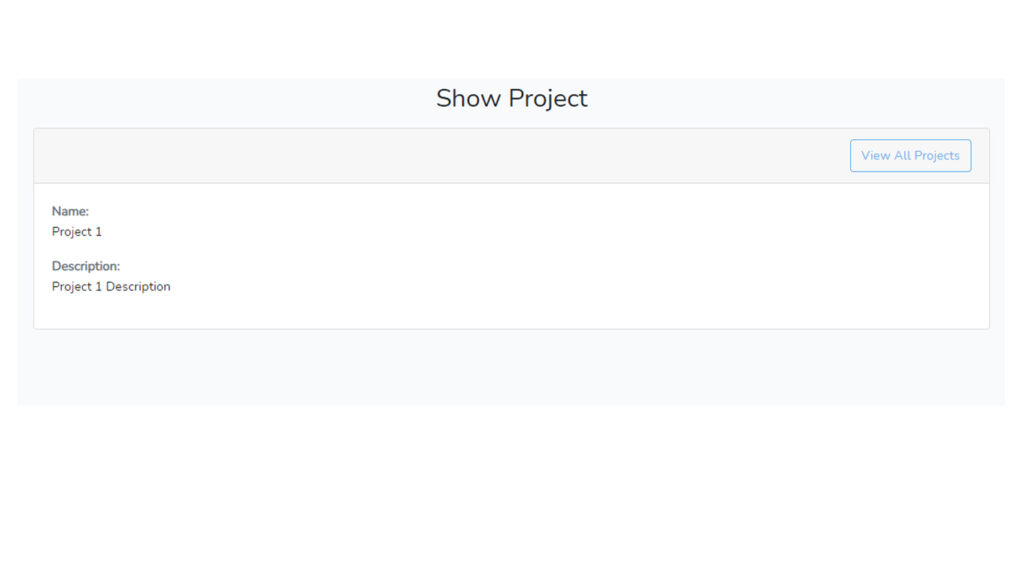
<h2 class="text-center mt-5 mb-3">Show Project</h2>
<div class="card">
    <div class="card-header">
        <a routerLink="/project/index"
            class="btn btn-outline-info float-right"
            >View All Projects
        </a>
    </div>
    <div class="card-body">
        <b className="text-muted">Name:</b>
        <p>{{project.name}}</p>
        <b className="text-muted">Description:</b>
        <p>{{project.description}}</p>
    </div>
</div>
Step 5: Create Module and Routing
After creating the component we will then create a module and routing. Run the command below:
ng generate module project --routing
now we will update the code of the module and routing.
src\app\project\project.module.ts
import { NgModule } from '@angular/core';
import { CommonModule } from '@angular/common';
import { ProjectRoutingModule } from './project-routing.module';
import { FormsModule, ReactiveFormsModule } from '@angular/forms';
import { IndexComponent } from './index/index.component';
import { CreateComponent } from './create/create.component';
import { EditComponent } from './edit/edit.component';
import { ShowComponent } from './show/show.component';


@NgModule({
  declarations: [
    IndexComponent,
    CreateComponent,
    EditComponent,
    ShowComponent
  ],
  imports: [
    CommonModule,
    ProjectRoutingModule,
    FormsModule,
    ReactiveFormsModule
  ]
})
export class ProjectModule { }
src\app\project\project-routing.module.ts
import { NgModule } from '@angular/core';
import { RouterModule, Routes } from '@angular/router';
import { IndexComponent } from './index/index.component';
import { CreateComponent } from './create/create.component';
import { EditComponent } from './edit/edit.component';
import { ShowComponent } from './show/show.component';

const routes: Routes = [
  { path: '', redirectTo: 'project/index', pathMatch: 'full'},
  { path: 'project', redirectTo: 'project/index', pathMatch: 'full'},
  { path: 'project/index', component: IndexComponent },
  { path: 'project/:id/show', component: ShowComponent },
  { path: 'project/create', component: CreateComponent },
  { path: 'project/:id/edit', component: EditComponent }
];

@NgModule({
  imports: [RouterModule.forChild(routes)],
  exports: [RouterModule]
})
export class ProjectRoutingModule { }
Step 6: Create Services and Interface
We will now create the services and interface
ng generate service project/project
ng generate interface project/project
Let’s update the code of services and interface.
src\app\project\project.service.ts
import { Injectable } from '@angular/core';
import axios from 'axios';
import { Project } from './project';

@Injectable({
  providedIn: 'root'
})

export class ProjectService {

  getAll (): Promise<any>{
    return axios.get('/api/projects')
  }

  delete (id:number): Promise<any>{
    return axios.delete('/api/projects/' + id)
  }

  create(data:any): Promise<any>{
    let payload = {
      name: data.name,
      description: data.description
    }

    return axios.post('/api/projects', payload)
  }

  show (id:number): Promise<any>{
    return axios.get('/api/projects/' + id)
  }

  update(data:Project): Promise<any>{
    let payload = {
      name: data.name,
      description: data.description
    }

    return axios.patch('/api/projects/' + data._id, payload)
  }

}
src\app\project\project.ts
export interface Project {
    _id: number;
    name: string;
    description: string;
}
Step 7: Update the AppModule and AppComponent
After finishing the step above we will now update the app module and app component:
src\app\app.module.ts
import { NgModule } from '@angular/core';
import { BrowserModule } from '@angular/platform-browser';
import { AppRoutingModule } from './app-routing.module';
import { AppComponent } from './app.component';
import { ProjectModule } from './project/project.module';

@NgModule({
  declarations: [
    AppComponent,
  ],
  imports: [
    BrowserModule,
    AppRoutingModule,
    ProjectModule,
  ],
  providers: [],
  bootstrap: [AppComponent]
})
export class AppModule { }
src\app\app.component.html
<div class="container">
<router-outlet></router-outlet>
</div>
Step 8: Run the app
We’re all done, what is left is to run the app.
ng serve
Open this URL:
http://localhost:4200/
Screenshots:
Index Page
Create Page
Edit Page
Show Page
