Contents
Today, I will be showing you how to integrate the Stripe payment gateway in Symfony 6. The payment gateway is one of the most important parts of an e-commerce site or any app that requires payment processing. One of the most popular payment processing platforms is stripe. Stripe has been one of the most chosen payment platforms for its simple integration and fast account setup.
I will be showing how to create a Charge in Stripe API using a token. We will now start the integration of Stripe to Symfony 6.
Prerequisite:
- Composer
- Symfony CLI
- PHP >= 8.0.2
Step 1: Install Symfony 6
First, select a folder that you want Symfony to be installed then execute this command on Terminal or CMD to install:
Install via composer:
composer create-project symfony/website-skeleton symfony-6-stripe-payment-gateway
Install via Symfony CLI:
symfony new symfony-6-stripe-payment-gateway --full
Step 2: Set Database Configuration
We must configure our database to avoid errors. Open the .env file and set database configuration. We will be using MySQL in this tutorial. Uncomment the DATABASE_URL variable for MySQL and updates its configs. Make sure you commented out the other DATABASE_URL variables.
.env
# In all environments, the following files are loaded if they exist,
# the latter taking precedence over the former:
#
#  * .env                contains default values for the environment variables needed by the app
#  * .env.local          uncommitted file with local overrides
#  * .env.$APP_ENV       committed environment-specific defaults
#  * .env.$APP_ENV.local uncommitted environment-specific overrides
#
# Real environment variables win over .env files.
#
# DO NOT DEFINE PRODUCTION SECRETS IN THIS FILE NOR IN ANY OTHER COMMITTED FILES.
#
# Run "composer dump-env prod" to compile .env files for production use (requires symfony/flex >=1.2).
# https://symfony.com/doc/current/best_practices.html#use-environment-variables-for-infrastructure-configuration

###> symfony/framework-bundle ###
APP_ENV=dev
APP_SECRET=e0710317861221371d185cc932acd15b
###< symfony/framework-bundle ###

###> doctrine/doctrine-bundle ###
# Format described at https://www.doctrine-project.org/projects/doctrine-dbal/en/latest/reference/configuration.html#connecting-using-a-url
# IMPORTANT: You MUST configure your server version, either here or in config/packages/doctrine.yaml
#
# DATABASE_URL="sqlite:///%kernel.project_dir%/var/data.db"
# DATABASE_URL="mysql://db_user:db_password@127.0.0.1:3306/db_name?serverVersion=5.7"
DATABASE_URL="postgresql://db_user:db_password@127.0.0.1:5432/db_name?serverVersion=13&charset=utf8"
###< doctrine/doctrine-bundle ###
Step 3: Install Stripe Package
We will now install the stripe package.
Execute this command:
composer require stripe/stripe-php
Step 4: Set Up Stripe Configurations
Add stripe api keys on the .env file. the API keys are found on your Stripe Dashboard under Developer API keys.
.env
STRIPE_KEY = 'pk_test_XXXXXX'
STRIPE_SECRET = 'sk_test_XXXXXX'
You can find you API keys on you stripe account dashboard, just navigate to Developers > API Keys.
Step 5: Create Controller
Run this command to create a controller:
php bin/console make:controller Stripe
After creating a controller, add these line of codes to the src\Controller\StripeController.php file:
src\Controller\StripeController.php
<?php

namespace App\Controller;

use Symfony\Bundle\FrameworkBundle\Controller\AbstractController;
use Symfony\Component\HttpFoundation\Response;
use Symfony\Component\Routing\Annotation\Route;
use Symfony\Component\HttpFoundation\Request;
use Stripe;

class StripeController extends AbstractController
{
    #[Route('/stripe', name: 'app_stripe')]
    public function index(): Response
    {
        return $this->render('stripe/index.html.twig', [
            'stripe_key' => $_ENV["STRIPE_KEY"],
        ]);
    }


    #[Route('/stripe/create-charge', name: 'app_stripe_charge', methods: ['POST'])]
    public function createCharge(Request $request)
    {
        Stripe\Stripe::setApiKey($_ENV["STRIPE_SECRET"]);
        Stripe\Charge::create ([
                "amount" => 5 * 100,
                "currency" => "usd",
                "source" => $request->request->get('stripeToken'),
                "description" => "Binaryboxtuts Payment Test"
        ]);
        $this->addFlash(
            'success',
            'Payment Successful!'
        );
        return $this->redirectToRoute('app_stripe', [], Response::HTTP_SEE_OTHER);
    }
}
Step 6: Create View File
Let’s update the view file that was also created when we create the controller:
/templates/stripe/index.html.twig
<!DOCTYPE html>
<html>
<head>
    <meta charset="utf-8">
    <meta name="viewport" content="width=device-width, initial-scale=1">
    <title>Stripe Payment Gateway</title>
    <link href="https://cdn.jsdelivr.net/npm/bootstrap@5.0.2/dist/css/bootstrap.min.css" rel="stylesheet" integrity="sha384-EVSTQN3/azprG1Anm3QDgpJLIm9Nao0Yz1ztcQTwFspd3yD65VohhpuuCOmLASjC" crossorigin="anonymous">
    <script src="https://cdn.jsdelivr.net/npm/bootstrap@5.0.2/dist/js/bootstrap.bundle.min.js" integrity="sha384-MrcW6ZMFYlzcLA8Nl+NtUVF0sA7MsXsP1UyJoMp4YLEuNSfAP+JcXn/tWtIaxVXM" crossorigin="anonymous"></script>
</head>
<body>
    <div class="container">
        <div class="row justify-content-center">
            <div class="col-4">
                <div class="card">
                    <div class="card-body">
                        {% for message in app.flashes('success') %}
                            <div
                                style="color: green;
                                    border: 2px green solid;
                                    text-align: center;
                                    padding: 5px;margin-bottom: 10px;">
                                {{ message }}
                            </div>
                        {% endfor %}

                        <form id='checkout-form' method='post' action="{{ path('app_stripe_charge') }}">
                            <input type='hidden' name='stripeToken' id='stripe-token-id'>
                            <label for="card-element" class="mb-5">Checkout Forms</label>
                            <br>
                            <div id="card-element" class="form-control" ></div>
                            <button
                                id='pay-btn'
                                class="btn btn-success mt-3"
                                type="button"
                                style="margin-top: 20px; width: 100%;padding: 7px;"
                                onclick="createToken()">PAY $5
                            </button>
                        <form>
                    </div>
                </div>
            </div>
        </div>
    </div>

    <script src="https://js.stripe.com/v3/" ></script>
    <script>
        var stripe = Stripe("{{stripe_key}}");
        var elements = stripe.elements();
        var cardElement = elements.create('card');
        cardElement.mount('#card-element');

        function createToken() {
            document.getElementById("pay-btn").disabled = true;
            stripe.createToken(cardElement).then(function(result) {


                if(typeof result.error != 'undefined') {
                    document.getElementById("pay-btn").disabled = false;
                    alert(result.error.message);
                }

                // creating token success
                if(typeof result.token != 'undefined') {
                    document.getElementById("stripe-token-id").value = result.token.id;
                    document.getElementById('checkout-form').submit();
                }
            });
        }
    </script>
</body>
</html>
Step 7: Run The Application
After finishing the steps above, you can now run your application by executing the command below:
symfony server:start
Open this URL:
https://localhost:8000/stripe
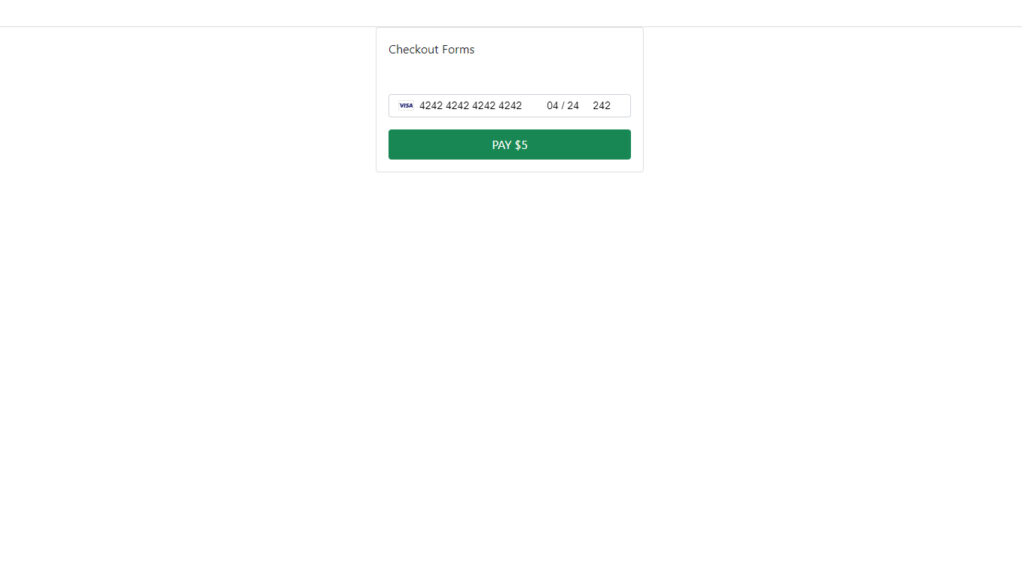
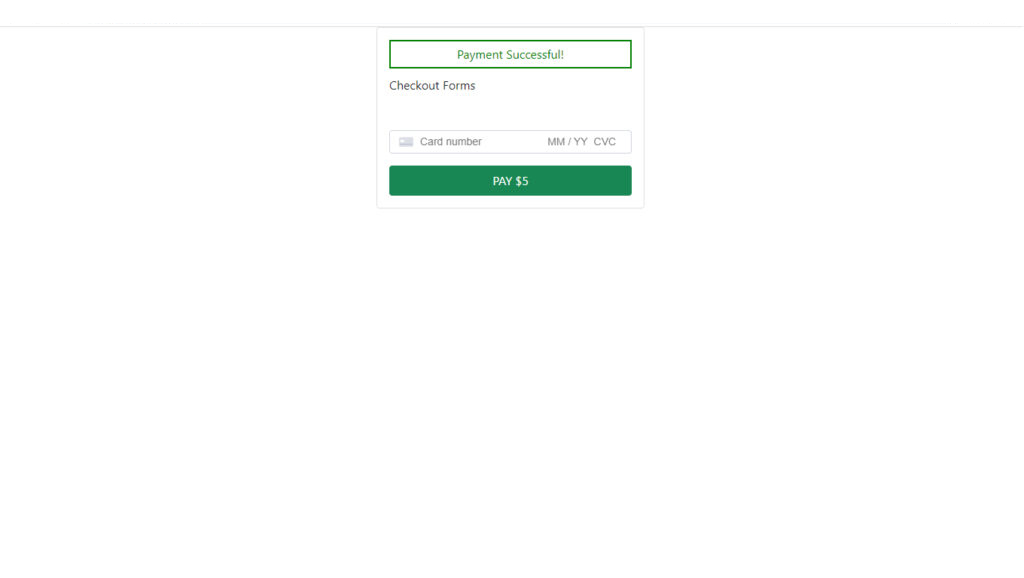
Screenshots:
Before Payment Transaction:

After Payment Transaction:


