Contents
Introduction:
Good day fellow dev, today I will be showing you how to make a Lumen 9 REST API. REST API is used for communication between client and server. REST stands for representational state transfer and API stands for application programming interface. REST API or also known as RESTful API is a type of API that uses the REST architectural style, an API uses REST if it has these characteristics:
- Client-Server – The communication between Client and Server.
- Stateless – After the server completed an HTTP request, no session information is retained on the server.
- Cacheable – Response from the server can be cacheable or non-cacheable.
- Uniform Interface – These are the constraints that simplify things. The constraints are Identification of the resources, resource manipulation through representations, self-descriptive messages, hypermedia as the engine of application state.
- Layered System – These are intermediaries between client and server like proxy servers, cache servers, etc.
- Code on Demand(Optional) – This is optional, the ability of the server to send executable codes to the client like java applets or JavaScript code, etc.
Now you have a bit of insight about REST API. we will now proceed on creating this on Lumen 9.
Lumen is a fast PHP micro-framework for developing web applications that have an elegant and expressive syntax. Lumen aims to ease the development by preparing the common tasks when developing web applications such as routing, database abstraction, queueing, and caching.
This tutorial has been made for beginners or new to Lumen. Let’s begin!
Step 1: Install Lumen 9 using Composer
Run this command on Terminal or CMD to install Lumen via composer:
composer create-project --prefer-dist laravel/lumen project
Step 2: Install Lumen Generator Package
We will be using this package to generate Laravel code with ease in our Lumen project.
Run this command on Terminal or CMD to install:
composer require flipbox/lumen-generator
After installing add this line on bootstrap/app.php and uncomment the eloquent:
$app->withEloquent();
$app->register(Flipbox\LumenGenerator\LumenGeneratorServiceProvider::class);
Step 3: Setup Database Configuration
Inside the project root folder open the file .env and put the configuration for the database.
DB_CONNECTION=mysql
DB_HOST=127.0.0.1
DB_PORT=3306
DB_DATABASE=lumen_9_rest_api
DB_USERNAME=root
DB_PASSWORD=
Step 4: Create a Model with Migration
Model are class represents that represents a table on a database.
Migration is like a version of your database.
Run this command on Terminal or CMD:
php artisan make:model Project --migration
After running this command you will find a file in this path “database/migrations” and update the code in that file.
<?php

use Illuminate\Database\Migrations\Migration;
use Illuminate\Database\Schema\Blueprint;
use Illuminate\Support\Facades\Schema;

return new class extends Migration
{
    /**
     * Run the migrations.
     *
     * @return void
     */
    public function up()
    {
        Schema::create('projects', function (Blueprint $table) {
            $table->id();
            $table->string('name');
            $table->text('description');
            $table->timestamps();
        });
    }

    /**
     * Reverse the migrations.
     *
     * @return void
     */
    public function down()
    {
        Schema::dropIfExists('projects');
    }
};
Run the migration by executing the migrate Artisan command:
php artisan migrate
Step 5: Create an API Resource Controller
The controller will be responsible on handling HTTP incoming requests.
Run this command to create an API Resource Controller:
php artisan make:controller ProjectController --api
This command will generate a controller at “app/Http/Controllers/ProjectController.php”. It contains methods for each of the available resource operations. Open the file and insert these codes:
app/Http/Controllers/ProjectController.php
<?php

namespace App\Http\Controllers;

use Illuminate\Http\Request;
use App\Models\Project;

class ProjectController extends Controller
{
    /**
     * Display a listing of the resource.
     *
     * @return \Illuminate\Http\Response
     */
    public function index()
    {
        $projects = Project::get();

        return response()->json($projects);
    }

    /**
     * Store a newly created resource in storage.
     *
     * @param  \Illuminate\Http\Request  $request
     * @return \Illuminate\Http\Response
     */
    public function store(Request $request)
    {
        $project = new Project();
        $project->name = $request->name;
        $project->description = $request->description;
        $project->save();

        return response()->json($project);
    }

    /**
     * Display the specified resource.
     *
     * @param  int  $id
     * @return \Illuminate\Http\Response
     */
    public function show($id)
    {
        $project = Project::find($id);
        return response()->json($project);
    }

    /**
     * Update the specified resource in storage.
     *
     * @param  \Illuminate\Http\Request  $request
     * @param  int  $id
     * @return \Illuminate\Http\Response
     */
    public function update(Request $request, $id)
    {
        $project = Project::find($id);
        $project->name = $request->name;
        $project->description = $request->description;
        $project->save();

        return response()->json($project);
    }

    /**
     * Remove the specified resource from storage.
     *
     * @param  int  $id
     * @return \Illuminate\Http\Response
     */
    public function destroy($id)
    {
        Project::destroy($id);

        return response()->json(['message' => 'Deleted']);
    }
}
Step 6: Register the routes
Now we register the API resource routes:
routes/web.php
<?php
/** @var \Laravel\Lumen\Routing\Router $router */

/*
|--------------------------------------------------------------------------
| Application Routes
|--------------------------------------------------------------------------
|
| Here is where you can register all of the routes for an application.
| It is a breeze. Simply tell Lumen the URIs it should respond to
| and give it the Closure to call when that URI is requested.
|
*/

$router->get('/', function () use ($router) {
    return $router->app->version();
});

// Route::apiResource('projects', ProjectController::class);
$router->group(['prefix' => 'api/'], function () use ($router) {
    $router->get('projects', 'ProjectController@index');
    $router->post('projects', 'ProjectController@store');
    $router->get('projects/{id}', 'ProjectController@show');
    $router->patch('projects/{id}', 'ProjectController@update');
    $router->delete('projects/{id}', 'ProjectController@destroy');
});
Step 7: Run the Lumen App
Run this command to start the Lumen App:
php -S localhost:8000 -t public
After successfully running your app, open this URL in your browser:
http://localhost:8000
Test the API:
We will be using Postman for testing our API, but you can use you preferred tool.
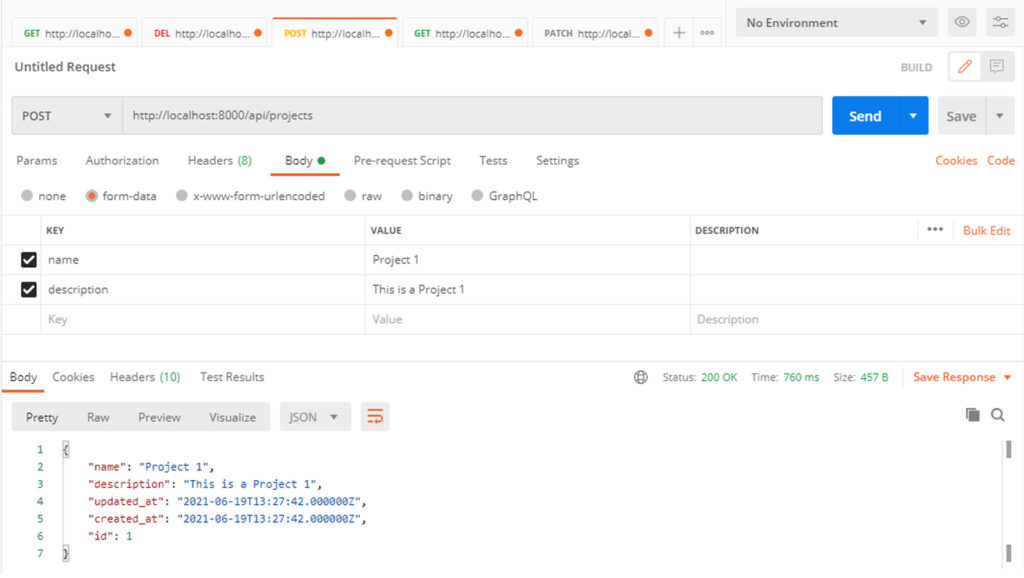
POST Request – This request will create a new resource.
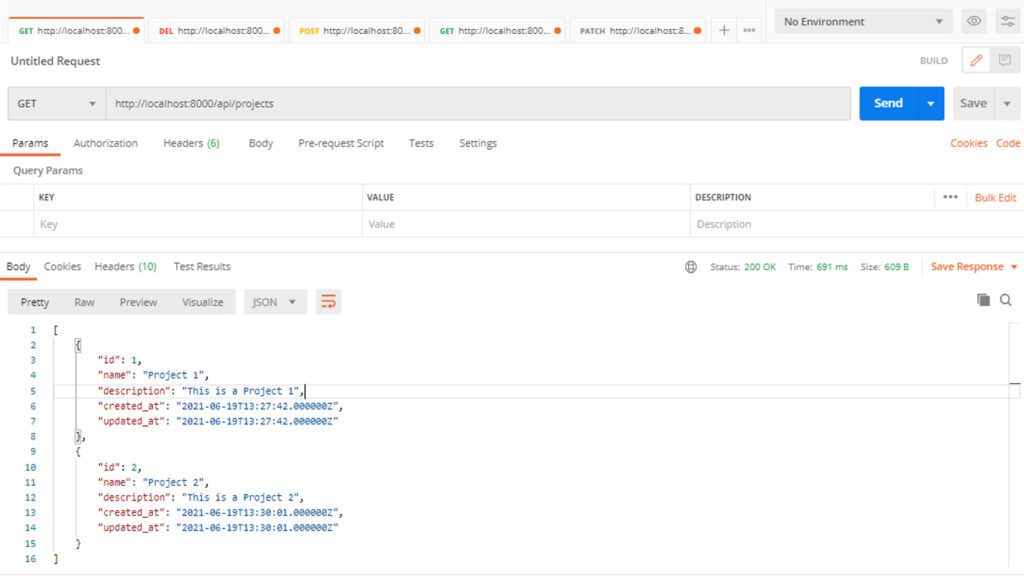
GET Request – This request will retrieve all the resources.
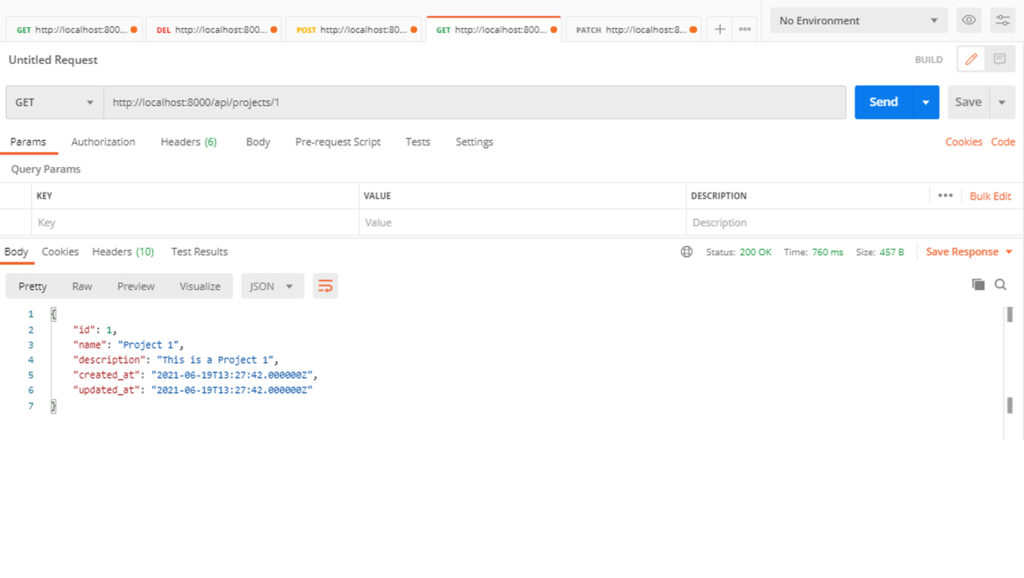
GET Request (with id) – This request will retrieve a particular resource.
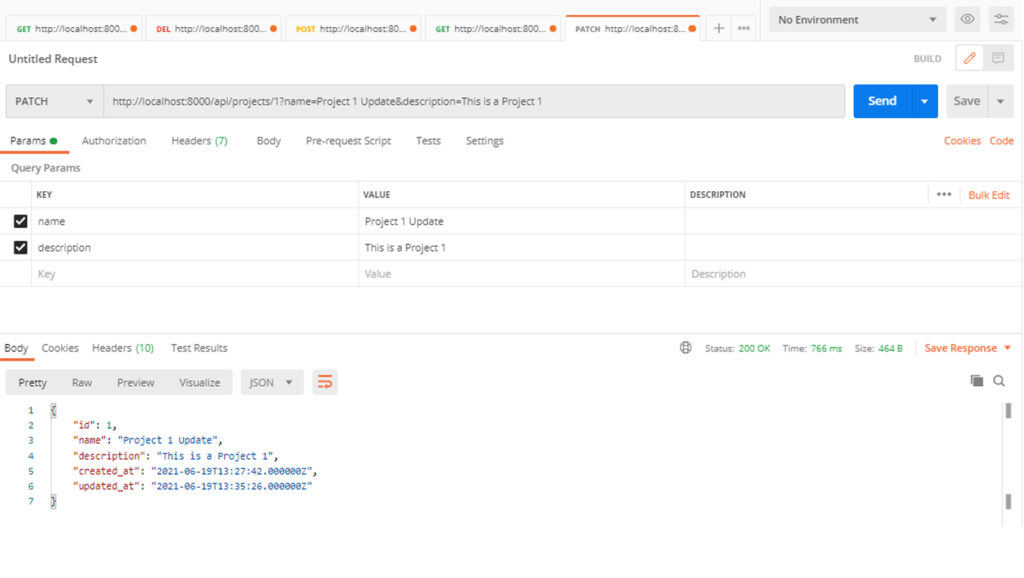
PATCH Request or you can use the PUT Request – This request will update a resource.
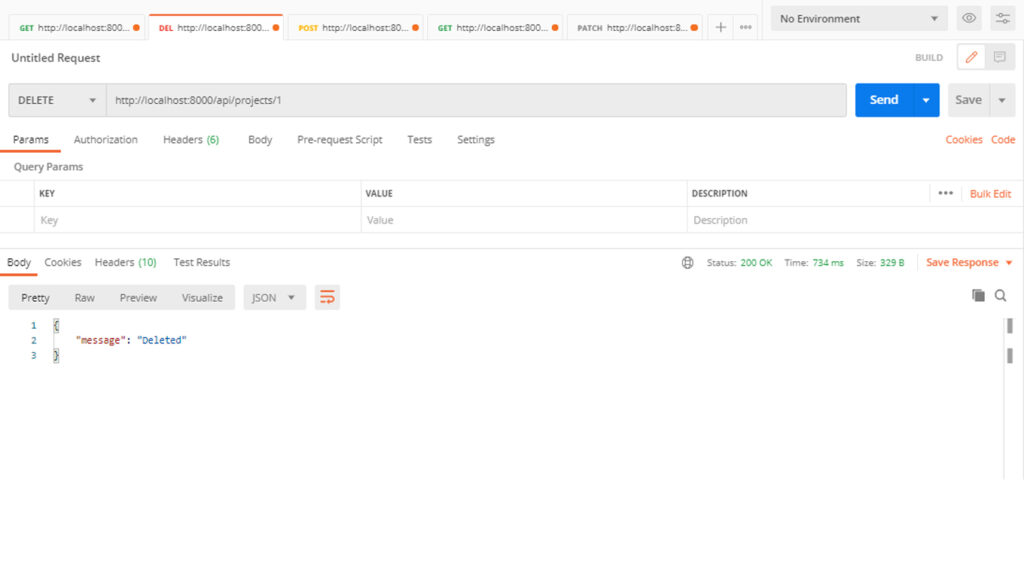
DELETE Request – This request will delete a resource.
